Wednesday, July 26, 2017

Photography: Creating Effects with the use of light

1. Bokeh

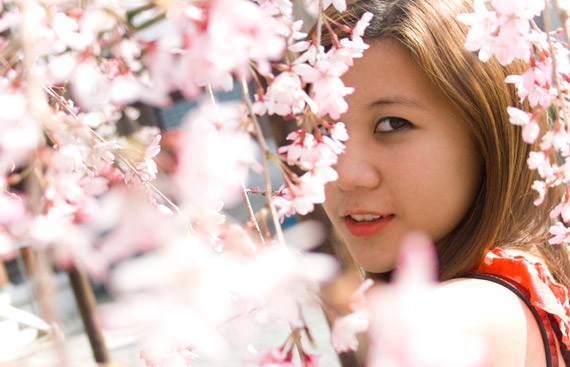
Bokeh refers to the aesthetic quality of blur, the out of focus area of the image. It’s how the light renders lighted areas that are out of focus. The difference in lens aberrations and aperture shape causes the area to blur, creating the look that’s aesthetically pleasing. Many photographers deliberately use the shallow-focus technique to create images with prominent bokeh areas. The term comes from Japanese ‘boke’, which literally means haze or blur.
There’s good bokeh, but there’s also bad bokeh when the blur is so distracting or harsh that it takes the focus away from the subject. Thus, good bokeh can enhance an image while bad bokeh can ruin it.
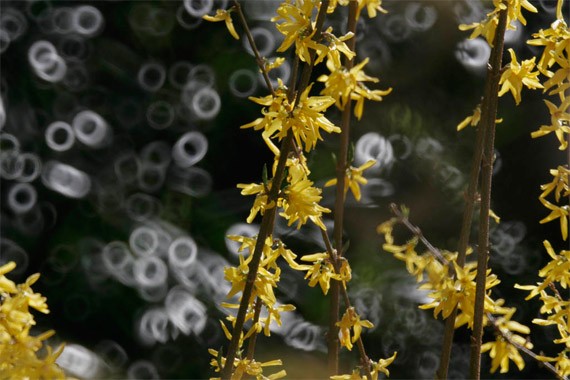
Example of bad bokeh.

Use of Creative Bokeh
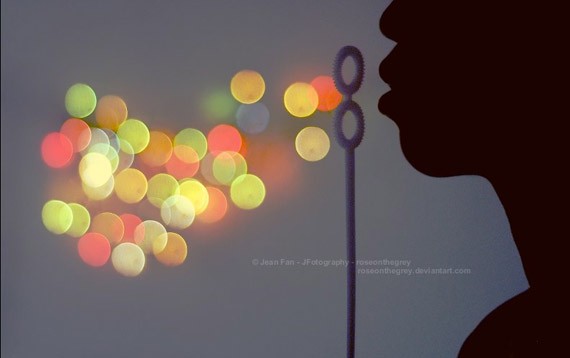
by Jean Fan
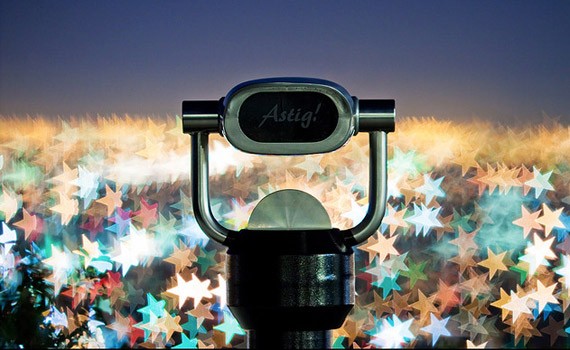
You can also create other shapes of bokeh, such as the heart and star bokeh photos shown below. This can be done by using a filter with the desired shape. You can even create your own. Tutorial can be found here.
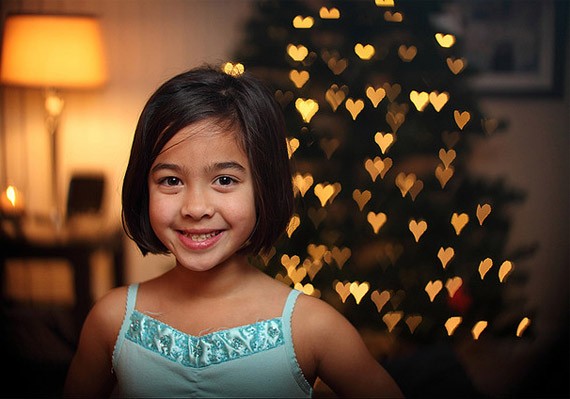
by CT Pham
Photo by Astig

2. Panning

Panning refers to the horizontal, vertical or rotational movement of an image still or video. It’s an age-old technique. To achieve panning, you must have a moving subject that you must ‘stay with’ whilst framing the shot before and after you press the shutter.
This will create an interesting effect, with your subject being sharp amid a blurred background. Great for shooting moving subjects or racing and sports events.
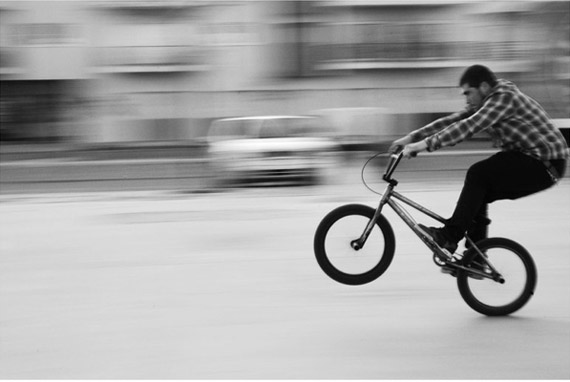
by Sofia Duarte
Panning will take a lot of practice, but you’ll get used to it and the effort is all worth it. Of course, it is easier to ‘follow’ a human subject than faster subjects like a dog, a motorcycle or a car.
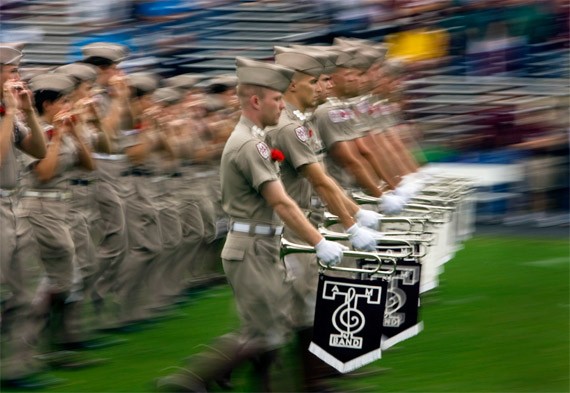
by Statesman

3. Rule of Thirds

The rule of thirds is one of the most basic principles of composition. It has been used for many centuries by artists, painters and now, photographers.
With the Rule of Thirds, the photographer breaks down the photo into thirds, horizontally & vertically so that you have nine equal parts. The main subject is not placed in the middle of the frame, thus it looks dynamic, moving and interesting.
When you are taking a picture you must mentally divide your viewfinder or LCD display into three to frame your shot. With the grid in mind, identify the important points of interest and frame. For some photographers, this comes naturally but for others, it will require practice.
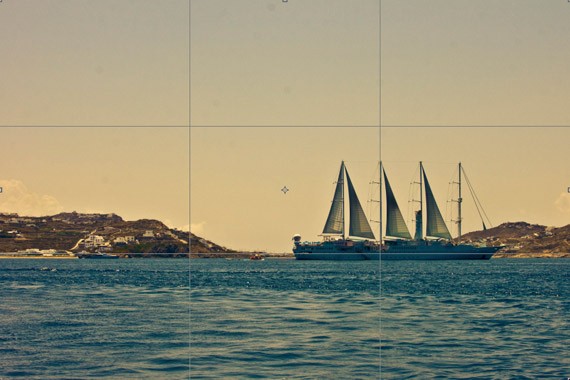
by Rachel Arandilla
Effective use of the rule of thirds create movement and interest in any photograph.

Photo by Majoy Chua
Keep in mind the rule of thirds for post production. If you find an image’s composition boring, you can always post process it by using the cropping and reframing tools of Photoshop. Experiment with the tools at hand to improve your photos.

4. The Golden Hour

The Golden Hour, also referred to as the Magic Hour, refers to the first hour the sun rises and the last hour the sun sets. It creates a different quality of light; it adds interest and drama to the scene. It’s the perfect time of the day for creating magnificent photos–but be quick, because lighting quickly changes and fades away.
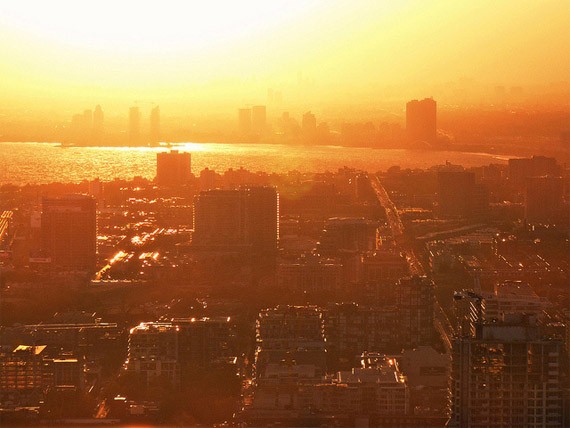
by Torontoist
What really happens during the golden hour? During sunrise and sunset, the sun is near the horizon so the daylight is of the indirect light from the sky, reducing intensity of the sun’s bright light.
There is softer lighting, warmer hues and longer shadows. In other times of the day, the sun’s light can be too bright and harsh. The sun’s harsh light is particularly a problem in portrait photography, for the light can create unwanted strong shadows around the face and body.
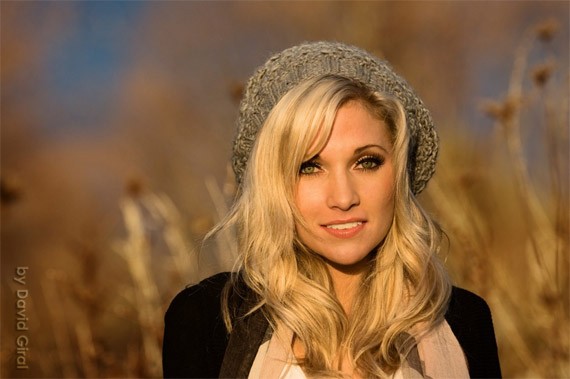
by David Giral
With landscape photography, photographing landscape during the golden hours enhances the colors of the scene.
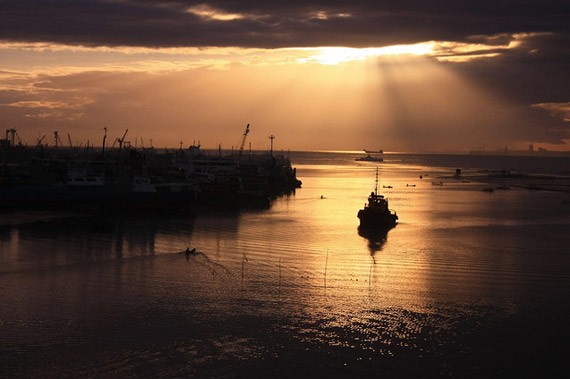
by Karen Bangcot

5. Golden Rectangle

The Golden Rectangle, (also the Golden Mean or the Golden Ratio) is another guideline for composition and a variation of the Rule of Thirds, but more intricate.
The Golden Rectangle is the mean of the ratio of numbers on the Fibonacci Sequence: 1, 1, 2, 3, 5, 8, 13, 21, 34 and so on). The ratio creates a golden rectangle, which is comprised of a square and half of the square in the same dimension.
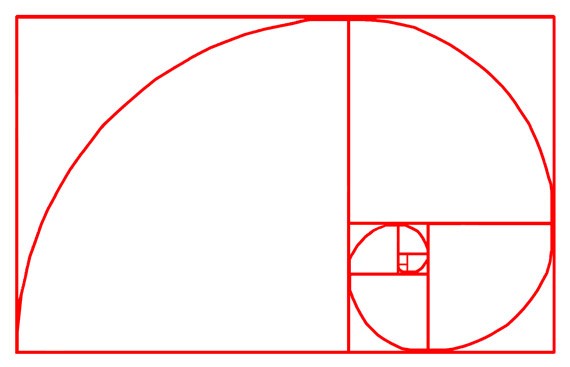
Again, the concept goes back to several centuries. The Golden Rectangle is even used to frame Leonardo da Vinci’s Mona Lisa. Paintings, artworks and photos following the Golden Rectangle tend to be stunning and pleasing to the eye. It’s because it’s an aesthetic proportion that can be found naturally: flowers, shells, butterflies and even the human body.
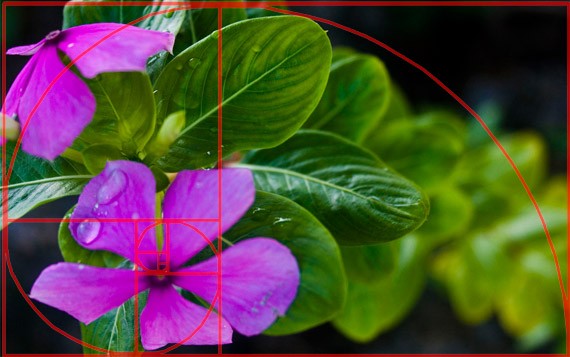
Photo by Rachel Arandilla
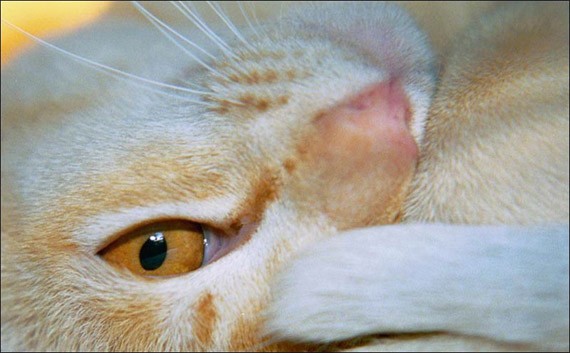
It is very hard to frame the image to the Golden Rectangle means directly from the LCD or viewfinder. Thankfully, there are now several programs that you can use to crop your photos to the Golden Rectangle dimensions during post-production.
by Chris Ganes

6. Fill Flash

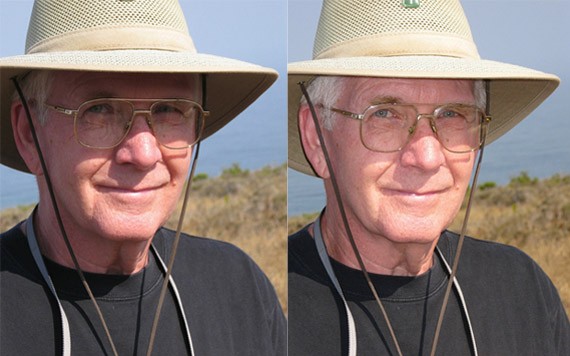
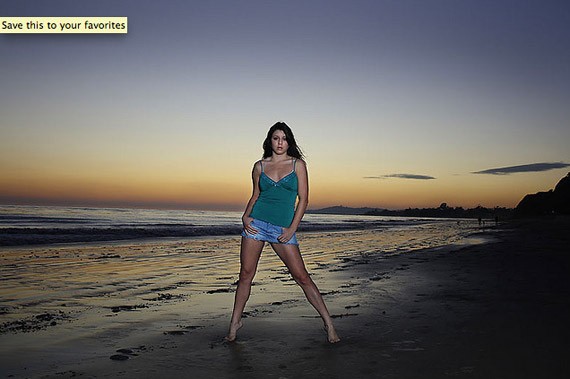
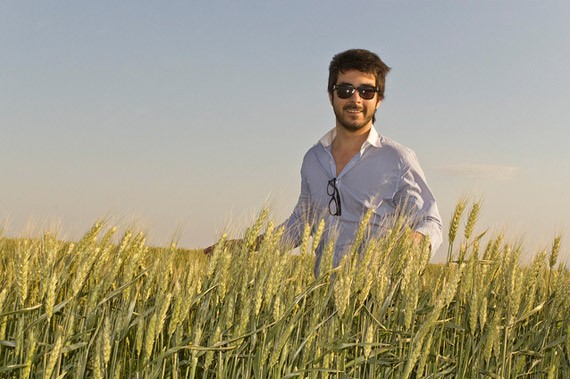
Fill Flash is a technique in photography where the photographer uses flash to ‘fill in’ dark areas of the image. It’s perfect for backlit environments. The background is usually a lot brighter than the subject. To create fill flash, adjust the aperture and shutter speed correctly to expose the background, use flash to lighten the foreground but still retain the qualities of the background.
You can use flash when: the subject is in a shadow, when there is more light on the background than on the foreground, and when you are close enough to the subject for flash. Remember that your built-in flash is only powerful enough to reach up to 9 feet only. Fill Flash can brighten deeply shadowed areas, improving the image without overexposing the other areas of the image.
by Mike Baird
Fill Flash is great for illuminating the eyes, especially on bright days and the subject is wearing a cap.
by Don Giannatti
by Adrian Biondi
by Eduardo Muriedas

7. Long Exposure

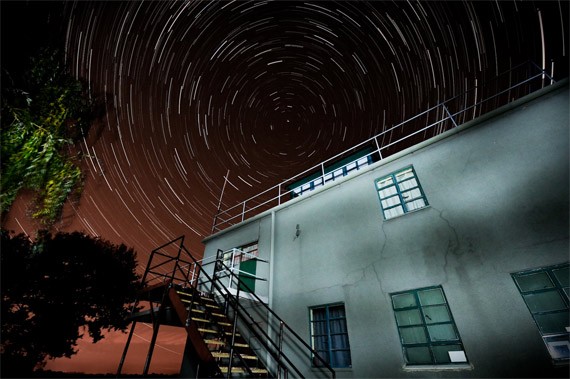
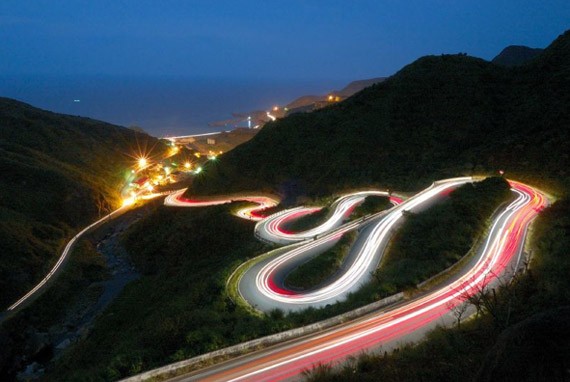
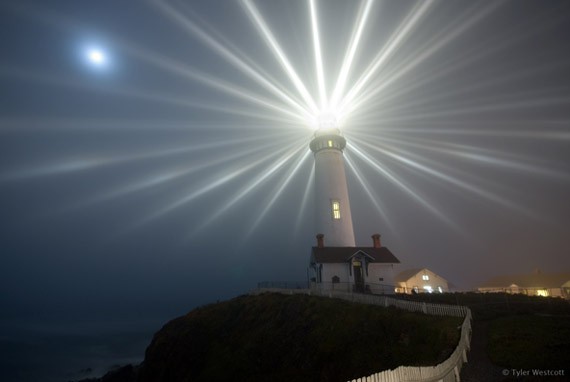
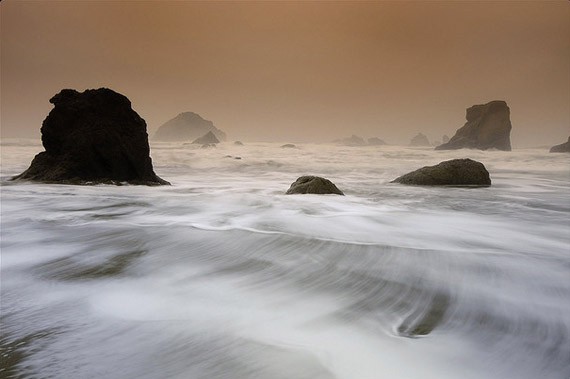
Long exposure is another interesting photography effect which entails a narrow aperture and long duration shutter speed. This is done in order to create dreamy landscapes, capturing the stationary elements while blurring the moving elements of the image.
Long exposure can be tricky. It should be taken in low light situations, most often photos will be overexposed because having long exposure on sunny days can be a problem, as too much light will enter the lens.
It is often referred to as ‘night photography’. Interesting subjects to shoot are stars, moving cars and lights.
by Cretique
by Matthew Fang
by Tyler Westcott
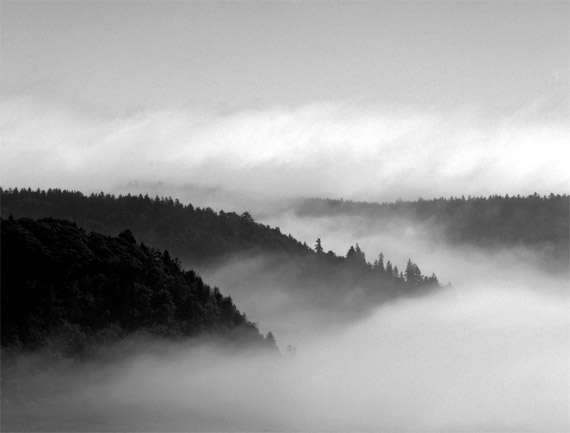
However, there are many beautiful long exposure photographs taken during low light daytime. Shooting fog and water on long exposure is popular in photography.
by Dene Miles
by Stan Mason

8. Contre-jour

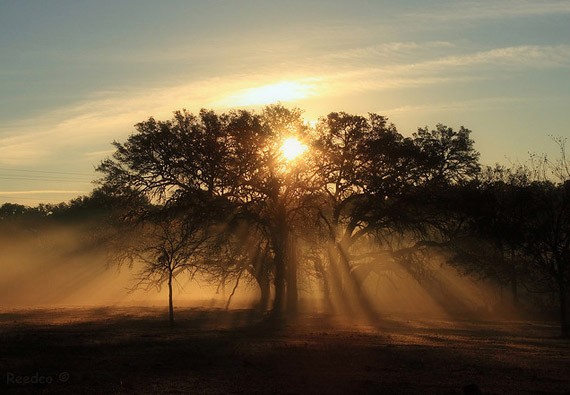
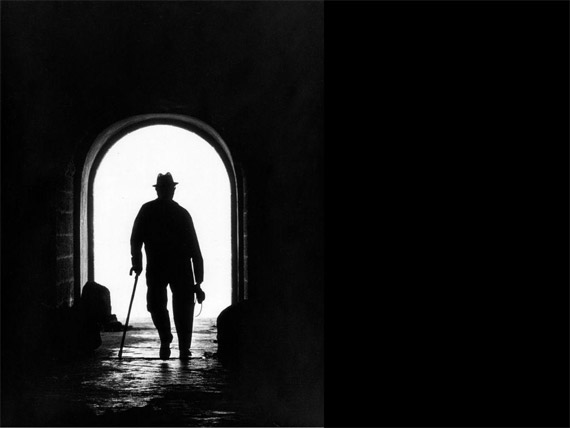
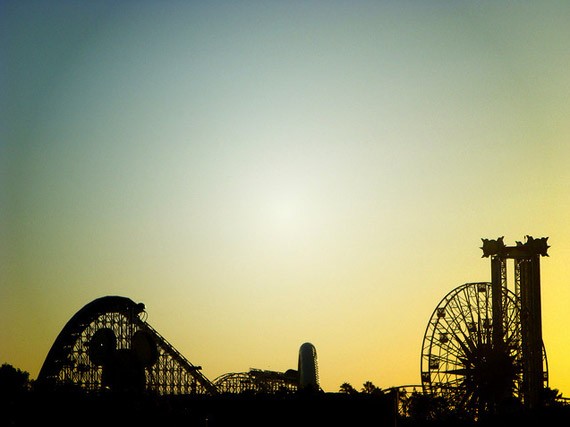
Contre-jour is a popular photography effect. It is French for ‘against daylight’, the camera is directly pointing towards the light source. Countre-jour is, basically, is the fancy speak of ‘silhouette photography’. The light source is located directly behind the subject.
The contre-jour effect produces high contrast photos between light and dark. It hides details yet emphasizes contour of the subject and shapes. Contre-jour is more popular in nature & landscape photography. The effect is often used to add a more dramatic mood and intense ambiance to the scene.
by ArtBible.net
by Karlos Portillo
Ironically though, contre-jour can enhance or reduce the quality of detail in the photo. Some recommend using a lens hood to enhance the effect of contre-jour in photographs, significantly reducing the glare coming into the lens. If too much light enters the lens, it will cause overexposure, causing the photo to lose definition.

Conclusion

You don’t need to follow these terms to the dot in order to create a beautiful and interesting image. In fact, rules are made to be broken! Art is about exploring yourself and your medium, after all. But to be an artist of your own you have to learn the basics first before you break them. That’s what Pablo Picasso and Van Gogh did.
Of course, these are not the only effects in photography. There are dozens more, and you can even create a photography effect through your own experimentation. Photography’s only limits is the photographer’s creativity
Photography: Outdoor Portraits

Outdoor Portraits
here are three very simple things that improve all photography, including portraits. To this day, there is no trick I have found that replaces the need for proper exposure, white balance, and sharp focus. Today’s digital cameras have less exposure latitude than a roll of Kodak gold film. In-camera metering systems have become much more advanced, but the sensors still lack the seven ƒ-stop exposure latitude that negative film has.

1) Never select all of the focus points for portraits, pick one.

When you pick the autofocus option that allows the camera to select focus points, you are doing your portraits a terrible disservice. This feature of a camera is usually designed to pick whatever is closest to the lens and focus there. In some cases, like with my 1DS Mark III, the camera will choose a cluster of focus points and make a “best guess” based on averaging the distance between all of the chosen points. Using one focus point gives you, the photographer, ultimate control.

2) Always focus on the eyes.

The eyes are the windows to the soul, and should be the focal point of any good portrait. Not only are the eyes the most important part of a good portrait, but they are the sharpest element on the face and should be left that way. When you are shooting with a wide aperture value focused on the eyes, the lens’s bokeh will aid in softening the skin as well.

3) Shoot wide open for shallow depth of field.

There are quite a few reasons to invest in a fast lens capable of wide aperture values; the most common is for shallow depth of field. Now that you can shoot at ƒ2.8 or ƒ4 you should use it. Most fantastic natural light portraits are from wide aperture values and it is all because of the wonderful smooth background blur we call “bokeh”.

4) Never, ever, shoot a portrait at less than 50mm; try to stay at 70mm or higher.

The last thing you want to hear from a client is “Why does my head look swelled?” Any focal length below 70mm can distort your subject, however it doesn’t become very noticeable until you are below 50 MM. The compression effect of a telephoto lens will also increase the blur of bokeh. Most of my portraits are done between 120mm and 200mm.

5) Always shoot in RAW.

A thousand times these words have bellowed from my mouth, and it will surely come out a million more. Raw is an unmodified compilation of your sensors data during the time of exposure. It is your digital negative. When you shoot in JPG format, everything but what the image processor needs to make a shell representation of the image you intended to capture is stripped away. For every edit you make to a JPG, you lose more data. With RAW, you can make a vast range of edits before creating the JPG. How can this make you portrait better? Think about the last time your white balance was set incorrectly, and you tried for hours to remove the color cast only to destroy the image with every attempt. RAW would have saved you by allowing you to fix the color before opening the image for retouching.

6) Always bring a gray card or a piece of a gray card for white balance.

You got me, gray cards aren’t free. However, $5.95 US for a cardboard Kodak gray card is darn close. To avoid confusion, I am going to explain this backwards. When opening Adobe Camera Raw or any other RAW image editing application there is always a way to select a custom white balance. Usually it is an eyedropper of some kind that you can use to click on what you think is neutral gray in your image. Imagine a world where your photo shoot involved 4 locations and a total of 800 images, and all day the camera was set to Auto White Balance. That is 800 different white balance values, a post production nightmare. If, at each location, you have your subject hold the gray card on the first shot, you will save hours of work. When you open location one (200 images) in your favorite post production application, all you have to do is click the eye dropper on the gray card, select all and synchronize the rest. Precious hours have been saved. (If you plan on taking your time, it may be wise to do this once every 30 minutes or so to compensate for the changing light of day.)

7) Shoot in the shade (Avoid direct sunlight)

Direct sunlight is harsh, makes your subject squint, and creates hard directional shadows and unpredictable white balance conditions. When shooting in the shade, there are no more harsh shadows, only smooth milky shadows created by your subject’s natural features. With proper exposure and white balance, you can make these shots look amazing.
8) Shooting carefully on an overcast day.
Natures softbox is a giant blanket of clouds. A good heavy blanket of cloud cover can help you enrich your colors, and make some very smooth and pleasing shadows.

9) If you must use hot, hard, bright light…

Always try to control the direction, use some kind of reflector, and try to mimic a studio light. Putting the sun directly behind your subject isn’t a good idea, unless you are trying to make a silhouette. When the sun is at my back, I have the subject look off camera (away from the sun) and get very nice results. Another great trick is to wait for a cloud to move in front of the sun, this usually creates a very bright yet contrasted look.

10) Use an existing reflector.

For example, my guess is that about 75% of the delivery trucks on the planet are white. These big white delivery trucks can make amazing fill light reflectors as long as they weren’t painted with an off white. (A yellow tint can change the white balance in your shadows.) Picture framing outlets and craft stores always have medium to large sized pieces of foam core lying around that have been left for scrap. They are usually more than happy to part with these scraps, and if not, chances are there are pieces by the dumpster.

11) Learn the sunny ƒ16 rule.

Why? So you have a baseline for proper exposure in your mind to work with if no other tools are present. The sunny ƒ16 rule states that on a sunny day, with your aperture value set to ƒ16, your shutter speed will be the inverse of the current ISO speed. For example, if your camera is set to ISO 100, and your aperture value is ƒ16, your shutter speed will be 1/100th of a second. On a cloudy day (or when in the shade) you simply use ƒ8 instead. If you own either an incident light meter, or gray card use either for the most accurate exposure instead. (Note: the procedure for metering exposure with a gray card is not the same as a custom white balance.)

12) Bring a sheet and a few spring clamps from home.

Leave the expensive 200 thread count sheets on the bed. You already got them? Well go put them back. You know that cheap old sheet you stuck in the corner of a closet to use as a drop cloth the next time you paint? Go get it. (Another option is to buy the cheapest, lowest thread count, white top sheet you can find.) A queen size sheet is an amazing, cheap, diffuser. Sort of a sever foot soft box for the sun. Wrap an edge of the sheet around a branch or clothes line and clamp for a side light. (Anchor the bottom corners with rocks to keep it from blowing into your image.) Clamp all for corners to anything you can above your subject for an overhead light.

13) Keep the power-lines and signs out!

We have already discussed keeping your camera focused on the eyes; keep your mind focused on the image as a whole. Power lines, signs, long single blades of grass, single pieces of garbage, sometimes even trees can be serious distractions from the overall focus of the image… The person you are photographing.
Last, and most important, have a great time shooting, enjoy what you’re doing and it will show in your work, and the expression of your subject.

A few Bonus Tips on Shooting on Cloudy Days

Clouds are wonderful. They create a giant blanket of natural sunlight diffusion to make your images rich and powerful. The clouds can fool your mind in ways you can’t imagine, much like your mind corrects for the natural white balance throughout the day.
When you are shooting on an overcast day, custom white balance is especially important. Every day is completely different for color, and that color depends on two things. First, the time of day, as most people understand white balance and how it changes throughout the day. Second, you have to account for all of the wonderful things that light has to pass through before it hits your subject.
Pollution changes the color of the light from minute to minute even if your eyes don’t see it, your camera does. On a cloudy day, pollution particles are being carried around in the sky by little tiny prisms; water droplets. Now your sunlight is passing through nature’s prism and reflecting off of pollution particles in infinite directions.
Don’t forget to white balance with that custom, tricked out, six dollar piece of cardboard, your Kodak gray card.
The ultimate secret to shooting on a cloudy day is a compass. (You either tipped your head like a confused Chihuahua or just had an epiphany.) I am an experienced, internationally published photographer, and rarely can I see where the sun is coming from on an overcast day. The light isn’t omnipresent; it’s just diffused, softened and scattered. Sunlight on a cloudy day is still directional, and your subject still has a dark side. Use a compass to find out where the sun is, put it at your back and shoot like mad. Never again will you look at an image after and wonder why the sky is blown out when it was so cloudy, or why the clouds look great but your subject is dark.

Photography: Outdoor Photography

What is the best setting for outdoor photography?

How to set up your camera to achieve maximum depth of field

  • Exposure mode: Aperture Priority (A or Av) ...
  • Focus mode: Manual. ...
  • Shutter speed: Set by camera.
  • Aperture: f/16.
  • ISO: 100.
  • Lens: 18 to 24mm.
  • Drive mode: Single shot.
  • White balance: Daylight.

What is most important when taking photos outside?

    1. Carry a tripod. The easiest way to improve your photographs is to use a tripod. You'll get clearer photos, and a slower shutter speed can allow you to take a deeper depth of focus.
    2. Shoot during the "magic hour." Plan your hikes around good light. The hours at the beginning and end of the day will yield exceptional photos. The rest of the day pales in comparison.
    3. Use supplemental lighting. Sometimes nature's lighting isn't the best for photography. Simple, supplemental lighting from fill-flash, reflectors, and even strobes can do wonders for your photos.
      Rule of Thirds
      An example of composing a photo using the 'rule of thirds.'
    4. Avoid the "bullseye." When composing your photo, throw things off center on purpose. Use the "rule of thirds," which imagines your photo divided into a three-by-three grid, with the horizon and important elements of the photo found within or along the lines of that grid.
    5. Less is more. Simplify your photos. Pick out the most important element you see and focus in on it.
    6. Add a human touch. Humans are part of the landscape, so don't be afraid to include them in your outdoor photos. People add scale, personality, and interest to landscape photography. Run ahead on trail and take photos of hikers facing the camera rather than walking away.
    7. Catch the action. Try techniques such as panning with a moving subject, slow shutter speeds, fast shutter speeds, or moving the camera on purpose. These can all add the perception of dynamic action to your outdoor photos.
    8. Watch the water. The Cascades and much of the Northwest are defined by moving water. Use a tripod and slow shutter speeds to capture the beautiful, blurred motion of moving water.
    9. Change your point of view. Galen Rowell called this "participatory photography." Finding new perspectives is one way to boost the creativity of your photos. Try a chest harness, an extension arm, or helmet cam to get a different point of view. Or simply crouch low or stand on a rock for a different perspective on a familiar subject.
    10. Add a filter. Two simple, inexpensive filters can often improve your photos. A polarizing filter can deepen the color of the sky and allow you to see into lakes and streams. A graduated neutral density filter, when used properly, can help you avoid the common problem of underexposed forest and overexposed white mountains in the same photo.

    What is the best ISO for outdoor portraits?

    Set your autofocus and drive mode to single shot, your white balance to Daylight (or Cloudy, depending on your conditions) and your ISO to 100, assuming you have good light. Now set your exposure mode to Aperture Priority and select a large aperture, such as f/2.8, in order to throw the background out of focus. 

What is the best aperture setting for outdoor photography?

Aperture advice. When shooting portraits, it's best to set a wide aperture (around f/2.8-f/5.6) to capture a shallow depth of field, so the background behind your subject is nicely blurred, making them stand out better.

What is a good shutter speed for outdoors?

In my example, the camera set the shutter speed at 1/250th of a second for the outdoor shot. Detecting less light in the indoor shot, the camera chose a slower shutter speed of 1/15th of a second.