Tuesday, October 31, 2017


Macro Lenses: Magnification, Depth of Field  and 
Effective F-Stop
A proper macro lens is designed to eliminate aberrations, focus colors and attain maximum sharpness on close-up subjects

macro lens guide
Macro is one of the more challenging types of photography from a technical perspective, and choosing the right lens for macro work can be similarly perplexing. The word macro is often (and incorrectly) used interchangeably with “close-up.” The two are not synonymous. While a macro image may indeed be made at a close distance to the subject, it’s the magnification of the subject, and not its proximity to the lens, that defines macro photography.
Macro is the photo opportunity that’s always available. You can find good close-up subjects just about anywhere. All you need is a way to make your camera focus close enough. Dedicated macro lenses are the best option because they can focus from infinity down to close enough to produce a life-size (1:1) magnification at the image plane. Macro lenses also are optically optimized for close focusing distances, so they produce better results at such close range than non-macro lenses used with extension tubes (and lenses with extension tubes attached can no longer focus out to infinity).
Most macro lenses also are well corrected for flat fieldwork, such as photographing stamps and coins, which may or may not be useful for nature photography. The main drawbacks of macro lenses are that they’re generally bulkier and more costly than non-macro lenses of equal focal length, although the differences today aren’t nearly as great as they were some years ago.

Macro Lens Magnification

What makes a “true” macro lens? Many lenses are labeled “macro” by manufacturers because they are able to focus at very close distances, but that doesn’t make them true macro lenses.
When we talk about magnification regarding macro lenses, we’re talking about magnification at the image plane. You can blow up the image well beyond that on your computer monitor or in a print, and that can make the macro subject much bigger than in real life—even if you shot it with a non-macro lens. But the macro lens gives you the advantage of more pixels recording the subject instead of being thrown away. The image of the subject will be recorded bigger in the frame, with the potential to reveal more detail.
A true macro lens will have 1:1, or 1x magnification (or greater). What this means is that the size of the subject projected on the image plane by the lens is its actual physical size—a flower that’s 2 centimeters in diameter will be rendered 2 centimeters in diameter on the sensor.
It’s important to note that sensor size does not affect the magnification power of the lens itself. This is a common misconception. The “crop factor” of smaller sensors is just that: a crop. This makes an object appear magnified in relationship to the sensor’s frame because the image circle produced by the lens is larger than the sensor. So for practical purposes, you do get more magnification with the smaller sensor in that the subject fills up more of the image frame. The actual magnification produced by the lens at the image plane doesn’t change; rather, it’s the amount of that image that each sensor size sees that changes.

Macro Lens Focal Lengths

Focal length is an important consideration in macro photography because it determines your “working distance” from the subject. The longer the focal length, the greater the working distance to achieve 1:1 magnification. With a 100mm macro, you’ll be twice the distance from your subject than with a 50mm macro. This is beneficial when photographing live subjects that may be alarmed by your proximity. You’re also less likely to block ambient light on your subject—another inherent challenge of macro photography—when working from a greater distance.
A normal (50mm for a full-frame camera) macro lens produces its 1x magnification at a distance of around seven to eight inches, a short tele macro lens (100mm for a full-frame camera) at around 12 inches and a tele (200mm for a full-frame camera) at around 19 inches. Shooting closer to the subject expands perspective, while shooting from farther away compresses it.

Minimum Focusing Distance Of Macro Lenses

Unlike magnification, the minimum focusing distance of a lens is a relatively straightforward concept. This is the closest distance your lens can be positioned from the subject and still achieve sharp focus. You’ll observe that the minimum focusing distance increases along with focal length. That’s because for 1:1 magnification, as noted in our discussion of focal length, you’ll need to be closer to the subject with a wider lens than you will with a telephoto lens.

Macro Lens Depth Of Field

Most normal and short tele macro lenses have a maximum aperture of ƒ/2.8, while most tele macros have a maximum aperture of ƒ/3.5 or ƒ/4. Due to the limited depth of field at macro shooting distances, these apertures let you produce dramatic selective-focus effects; focus on a particular part of a flower or the eye of an insect, and everything closer to the camera or farther away blurs nicely.
If you want an entire insect or flower to be sharp, you’ll have to stop the lens way down to increase depth of field. Even then you probably won’t get the entire subject sharp due to the very limited depth of field at very close shooting distances. Stopping the lens way down introduces the effects of diffraction—at very small apertures, light bends around the edges of the aperture, reducing overall sharpness, even as increased depth of field increases it.
Most professional macro photographers use electronic flash to illuminate their subjects. Electronic flash offers two major benefits; it’s bright at macro range, allowing you to stop all the way down to increase depth of field, and its very brief duration at short range (1⁄10,000 sec. and shorter) minimizes the effects of camera shake and subject movement. Special macro flash units mount on the lens and allow you to set them to provide even lighting or directional lighting.

Focusing Macro Subjects

Most macro lenses in production today offer autofocusing, but it’s generally best to focus a macro subject manually. That’s the only way to be sure focus is exactly where you want it. If a particular magnification is desired, set that (most macro lenses have magnification or reproduction ratio reference markings on the barrel), then slowly move the camera in on the subject until it comes into focus in the viewfinder or on the LCD monitor if you’re using Live View mode. Once you’ve achieved focus this way, you can activate the AF system to maintain focus if the subject is moving. If you just want the biggest image of the subject, set the lens to its minimum focusing distance, and move in until the subject appears sharp in the finder. Of course, you’re free to position the camera, then adjust focus using the focusing ring or even AF, which can work, too.

Macro Lenses & Image Stabilization

A tripod can hold the camera steadier than we can, and can lock in a composition of a nonmoving subject so you don’t accidentally change it as you squeeze off the shot. For the sharpest, most controlled macro compositions, a tripod is especially essential for macro work. At this level of magnification, even the smallest movements can degrade sharpness.
Working from a tripod also lets you experiment with depth-of-field by varying your aperture without changing your composition, and can be further used for focus stacking techniques. But it can sometimes be difficult to position the camera exactly where you want it for a macro shot using a tripod, so many macro shooters work handheld, using electronic flash’s brief duration to minimize blur due to camera shake. You may want to try it both ways to see which works best for your macro photography. A monopod is a good compromise, making it much easier to position the camera right where you want it, yet providing more support than pure handholding. Still, having the option of optical image stabilization is a nice alternative when using a tripod isn’t practical or possible.
Influence of Lens Aperture / f-number


Influence of Lens Aperture / f-number
Aperture is one of the three pillars of photography, the other two being ISO and Shutter Speed. Without a doubt, it is the most talked about subject, because aperture either adds a dimension to a photograph by blurring the background, or magically brings everything in focus. 
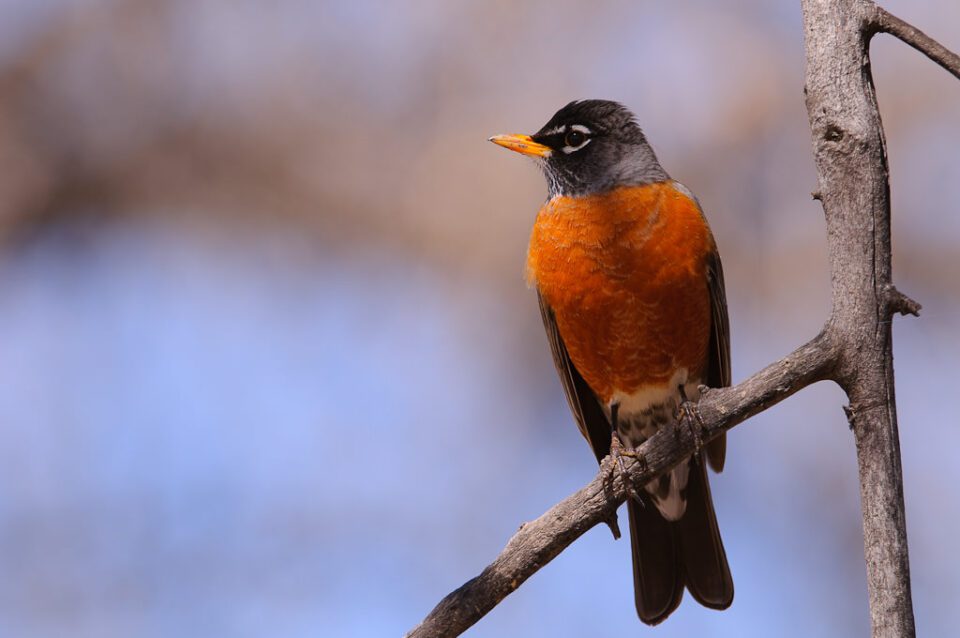
American Robin
NIKON D300 @ 340mm, ISO 200, 1/320, f/5.6
1) What is Aperture?
Simply put, aperture is a hole within a lens, through which light travels into the camera body. It is easier to understand the concept if you just think about our eyes. Every camera that we know of today is designed like human eyes. The cornea in our eyes is like the front element of a lens – it gathers all external light, then bends it and passes it to the iris. Depending on the amount of light, the iris can either expand or shrink, controlling the size of the pupil, which is a hole that lets the light pass further into the eye. The pupil is essentially what we refer to as aperture in photography. The amount of light that enters the retina (which works just like the camera sensor), is limited to the size of the pupil – the larger the pupil, the more light enters the retina.
So, the easiest way to remember aperture, is by associating it with your pupil. Large pupil size equals large aperture, while small pupil size equals small aperture.

2) Size of Aperture – Large vs Small Aperture

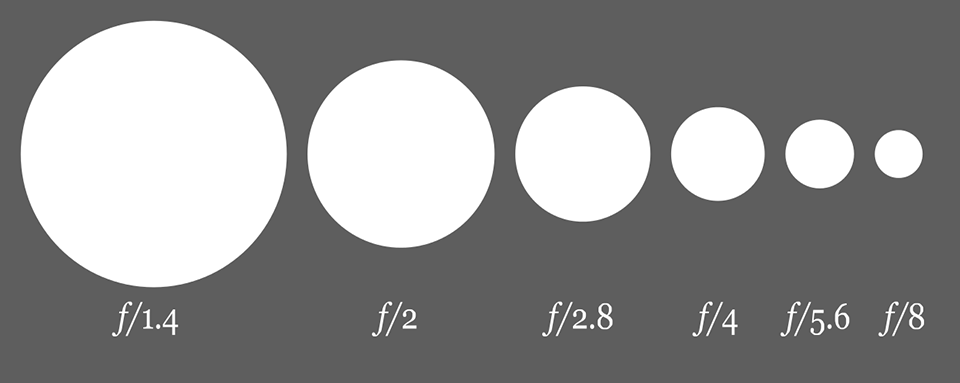
The iris of the lens that controls the size (diameter) of the aperture is called “diaphragm” in optics. The sole purpose of the diaphragm is to block or stop all light, with the exception of the light that goes through the aperture. In photography, aperture is expressed in f-numbers (for example f/5.6). These f-numbers that are known as “f-stops” are a way of describing the size of the aperture, or how open or closed the aperture is. A smaller f-stop means a larger aperture, while a larger f-stop means a smaller aperture. Most people find this awkward, since we are used to having larger numbers represent larger values, but not in this case. For example, f/1.4 is larger than f/2.0 and much larger than f/8.0.

F-numbers
The size of the circle represents the size of the lens aperture – the larger the f-number, the smaller the aperture.

3) What is Depth of Field?

One important thing to remember here, the size of the aperture has a direct impact on the depth of field, which is the area of the image that appears sharp. A large f-number such as f/32, (which means a smaller aperture) will bring all foreground and background objects in focus, while a small f-number such as f/1.4 will isolate the foreground from the background by making the foreground objects sharp and the background blurry.
Depth of Field
As you can see, just changing the aperture from f/2.8 to f/8.0 has a big effect on how much of WALL-E is in focus and how visible the background gets. If I had used a much smaller aperture such as f/32 in this shot, the background would be as visible as WALL-E.
Another example:
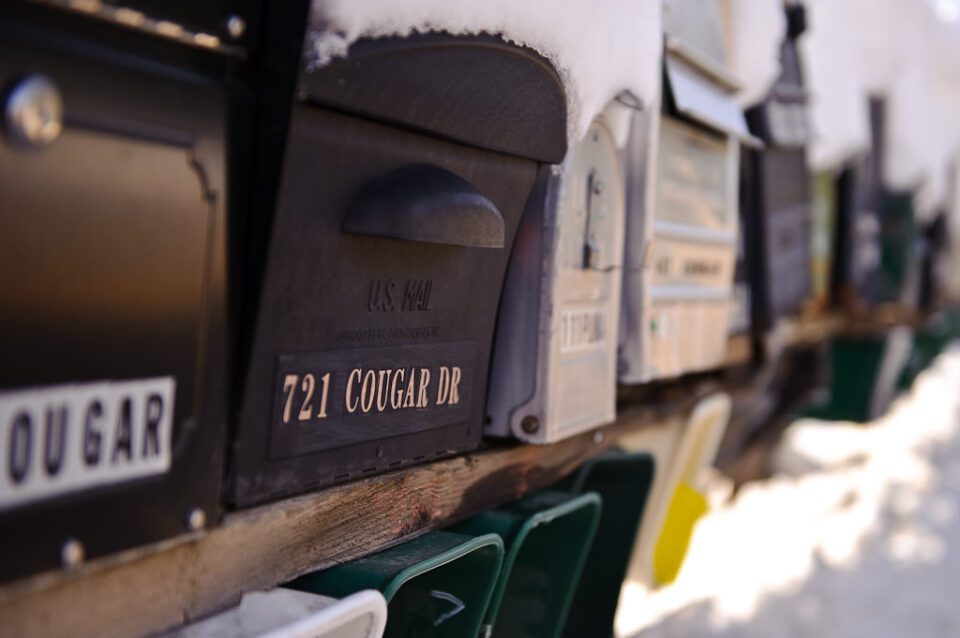
Mailboxes
NIKON D700 @ 48mm, ISO 200, 1/1600, f/2.8
In the above example, due to the shallow depth of field, only the word “Cougar” appears sharp, while everything else in the front and behind of that word is blurred. If I had used a larger aperture such as f/1.4 and focused on one of the letters, probably only that letter would have been sharp, while everything else would have been blurred out. The larger the aperture, the smaller the area in focus (depth of field).

4) Lens Apertures: Maximum and Minimum

Every lens has a limit on how large or how small the aperture can get. If you take a look at the specifications of your lens, it should say what the maximum (lowest f-number) and minimum apertures (highest f-number) of your lens are. The maximum aperture of the lens is much more important than the minimum, because it shows the speed of the lens. A lens that has an aperture of f/1.2 or f/1.4 as the maximum aperture is considered to be a fast lens, because it can pass through more light than, for example, a lens with a maximum aperture of f/4.0. That’s why lenses with large apertures are better suited for low light photography.
The minimum aperture is not that important, because almost all modern lenses can provide at least f/16 as the minimum aperture, which is typically more than enough for everyday photography needs.
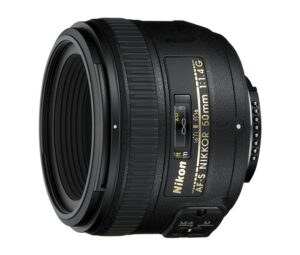
Nikon 50mm f1.4 AF-S
There are two types of lenses: “fixed” (also known as “prime”) and “zoom”. While zoom lenses give you the flexibility to zoom in and out (most point and shoot cameras have zoom lenses) without having to move closer or away from the subject, fixed or prime lenses only have one focal length. Due to the complexity of optical design for zoom lenses, many of the consumer lenses have variable apertures. What it means, is that when you are fully zoomed out, the aperture is one number, while zooming in will increase the f-number to a higher number. For example, the Nikon 18-200mm lens has a variable maximum aperture of f/3.5-f/5.6. When zoomed fully out at 18mm, the lens has an aperture of f/3.5, while when fully zoomed in at 200mm, the lens has an aperture of f/5.6. The heavy, professional zoom lenses, on the other hand, typically have fixed apertures. For example, the Nikon 70-200mm f/2.8 lens has the same maximum aperture of f/2.8 at all focal lengths between 70mm and 200mm.
Why is this important? Because larger maximum aperture means that the lens can pass through more light, and hence, your camera can capture images faster in low-light situations. Having a larger maximum aperture also means better ability to isolate subjects from the background.

Camera Lenses 2

If you’re new to photography, the vast array of lenses on the market might seem a little daunting. There exists not just a range of focal lengths, from the super-wide to the super-long, but even several variations on a single focal length, not to mention zoom lenses of all kinds. 

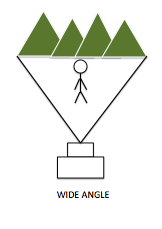
WIDE ANGLE

fisheye lens
Wide-angle lenses have three classes: Wide, ultra-wide, and fish-eye.You can tell a fish-eye lens by looking at it because the front element bows outwards, allowing it to see as wide as 180 degrees. This gives the signature fish-eye effect which bends all straight lines around the center and creates a circular effect in the image. These lenses are fantastic for certain purposes, but are often overused without real purpose – use them with caution.
An ultra-wide angle lens is one which has a focal length shorter than 20mm, but is built with internal lenses which are meant to correct the fish-eye distortion; these are sometimes referred to as “aspherical”.
wide angle lens
A regular wide-angle lens is defined as anything shorter than 35mm. These can capture wide scenes, and have a much larger depth of field (more will be in focus, from the foreground to the background). This, added to their expansive angle of view, make them the ideal choice for sprawling landscapes, as well as tight interiors.

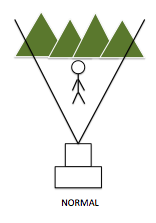
NORMAL LENSES

normal lens
A “normal lens”, as he mentions, is one that sees in a similar proportion to the human eye. These are typically between 35mm and 50mm and are among the most common prime lenses on the market (most brands sell a 50mm f/1.8 for under $250). They are wonderful for travel and street photography, because the images strike us as something that we would see with our own eye.

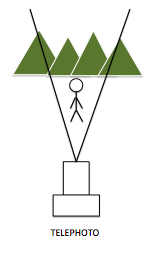
TELEPHOTO LENSES

telephoto lens
Telephoto lenses are technically defined as anything exceeding 50mm, though the term is usually used to describe lenses which are beyond 100mm; the ranges between 50-100mm are more commonly referred to as “portrait lenses”, because that is what they excel at and are primarily used for. Just the opposite of wide-angle lenses, telephotos shorten the depth of field, enabling you to isolate your subjects from the background with shallow focus; this is when only a short plane is sharp, and everything in front of or behind that plane falls rapidly into blur.

PRIME LENSES

portrait lens
A prime lens has no zoom – it is one focal length, and one only. Because the lens is manufactured precisely to provide this one length, and doesn’t have the moving pieces and mechanisms required to zoom, they can be tack sharp. Again, because of the relative simplicity of their build, they can have larger apertures (the size of the opening in the lens), and therefore are much more useful for indoor and low-light photography. If crisp and clear images are more important to you than convenience, these are the lenses you want to look at.

ZOOM LENSES

zoom lens
Most consumer-level and camera kit lenses will have a variable focal length – you can turn or slide them in order to zoom in and out. These are preferred by most travelers and hobbyists, because one or two lenses will give you an entire range, and you don’t need to be carrying a big, heavy camera bag and switching between ultra-wide and wide, or normal and telephoto. You can even find “superzooms” such as an 18-200mm, which cover the entire range that most people will ever need. Of course, the jack-of-all-trades is master of none, and these lenses won’t deliver such perfection as a prime is capable of – though many are very good, and getting better with each generation.

MACRO

macro lens
The macro lens has an intense level of magnification, capable of picking out the tiniest details and enhancing them larger than we can see with our own eyes. It’s thanks to these lenses that we’ve been able to see the texture of a fly’s face, or a flower’s pollen spores – such developments which have enhanced the human understanding of the world around us in immeasurable ways.

APERTURE

One thing that isn’t addressed in the video is: just what does it mean to say a lens is f4, or f3.5-5.6? This number is called the maximum aperture, and it refers to how large the opening can be that allows light to pass through the lens – the smaller the number, the larger the hole; the larger the hole, the more light is let in; the more light is let in, the better images you can get in low light. On a zoom lens, this will be expressed in a range – on the 18-55mm f3.5-5.6, the maximum aperture at 18mm will be f3.5, while the maximum at 55mm is f5.6.
The size of this opening also has a direct effect on depth of field (as mentioned before – how much is in focus, from foreground to background). The larger the aperture (smaller number), the less will be in focus (“shallow depth of field”), which enables beautiful isolation of pieces of a photograph, or what is called “selective focus”, such as in the image of the lizard above. However, because the larger hole demands more perfection in the lens construction, it can be very expensive to achieve this, which is reflected in the price of a lens.

Camera Lenses

Types of Camera Lenses

It’s Not What You See, It’s How You See It: Understanding the Different Types of Camera Lenses

When shopping for a new camera lens, you may find it difficult to choose from the multitude of options available.  This article will help you narrow your vision by breaking down several types of camera lenses.
You may want to also check out our tips on how to choose a camera lens, which has a video that explains the types of lenses.

Prime vs. Zoom

The first thing you need to understand is the difference between prime and zoom lenses.  Prime lenses are also called “fixed lenses,” because the focal length of a prime lens is fixed--meaning, you cannot zoom in or zoom out.  You can only shoot from a single angle of view.  If you want to add or remove certain elements from your picture, you will have to literally move yourself closer or farther away from your subject.  A zoom lens, on the other hand, refers to any lens that has a variable focal length--meaning you can zoom in and out at will.  With a zoom lens, you can remain in the same position but zoom in or out to change the content of your photo. There are pros and cons to both prime and zoom lenses.

Prime Lens

Prime Lens
Prime Lenses: Pros
  • Prime lenses tend to produce sharper images.
  • They tend to perform better in low light conditions.
  • They make you take your time when composing your images.
  • They are lighter and more compact than zoom lenses.
  • They tend to be less expensive than zoom lenses.
Prime Lenses: Cons
  • You are not able to zoom in or out.
  • You have to physically move in order to change the composition of your photo.
  • You may end up carrying more than one lens with you.

Zoom Lens

Zoom Lens
Zoom Lenses: Pros
  • You can zoom in and out as needed.
  • They can replace two or more prime lenses.
  • You do not need to physically change your position in order to recompose your image.
Zoom Lenses: Cons
  • Zoom lenses are bulkier and heavier than prime lenses.
  • Images may not be as crisp as with a prime lens.
  • They may not perform as well as prime lenses in darker situations.
  • They tend to be more expensive.
Now that we’ve clarified the difference between prime and zoom camera lenses, let’s take a look at different types of lenses.

Wide-Angle Camera Lens

“Wide-angle” usually refers to lenses with focal lengths between 17mm and 40mm.  Wide-angle lenses provide you with a broad view of the scene before you.  This makes them ideal for photographing landscapes, small interior spaces that you want to look larger, events like concerts where you are very close to your subjects, street photography, and environmental portraits--portraits that also include your subject’s surroundings.  The biggest downside of wide-angle lenses is that they can create distortion--they tend to stretch things out and make them look larger, especially elements that are close to your lens.  This makes them a less than ideal choice for portraiture, since they can be unflattering to your subject (no one wants their nose to look too big!).
Wide Angle

Normal or Standard Camera Lens

Lenses with a focal length of about 40mm to 60mm are considered “normal” lenses because they tend to replicate most accurately what the naked human eye sees.  They do not have as much distortion as wide-angle lenses, but they are still wide enough to replicate the peripheral vision of the human eye.  Because of these qualities, normal lenses are great for photographing portraits, creating precise compositions, street photography, and documentary photography projects.  This is a very useful and flexible lens.  When asked which single lens they would choose if they could only have one, many professional photographers answer “my normal lens.”
Normal Lens

Telephoto Camera Lens

Any lens with a focal length of about 70mm and longer is considered a telephoto lens.  These lenses produce the least distortion--making them another excellent choice for flattering portraits.  They are also extremely useful in situations where you cannot get too close to your subject--photographing a sports event, or while on safari, for example.  The downsides to these lenses is their size and weight--they tend to be quite heavy--and the fact that you cannot photograph subjects that are too close to you.
Telephoto lens

Specialty Camera Lenses: Macro and Fisheye Lenses

Macro lenses are used to create extreme close-up images, typically of very small objects, such as flowers and insects.  A macro lens can produce a life-size or even larger-than-life size scale image of tiny subjects.  They also allow you to get much closer to your subject than a typical lens while still retaining sharp focus.  If you’re interested in photographing nature, or perhaps cataloguing your coin or stamp collection, a macro lens will prove extremely useful.  There are some downsides to macro lenses, however.  Because you are so close to your subject, you need to keep your camera extra steady, so you may need to use a tripod.  Macro lenses also tend to produce images with a very blurry background, so you must be very careful and precise when you focus the lens.
A fisheye lens is an ultra wide-angle lens--any lens with a focal length less than 15mm.  These types of lenses tend to have about a 180-degree field of vision.  The effect you achieve with this lens makes it seem like you are seeing the world from inside a fishbowl--hence they name, “fisheye.”  Everything along the edges of your photo becomes extremely distorted, and your subject will seem much larger than normal.  Some common uses of fisheye lenses are for photographing action sports, landscapes, and to capture unusual perspectives.  These lenses are great for getting creative--but be warned, their novelty tends to wear off pretty quickly!

Use of Tripod


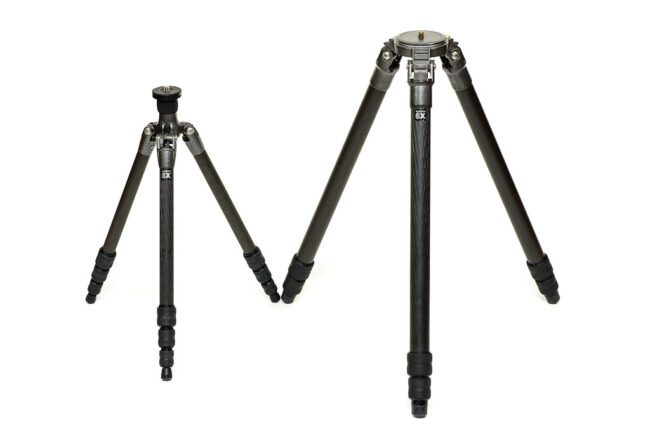
tripod is a portable three-legged frame, used as a platform for supporting the weight and maintaining the stability of some other object. A tripod provides stability against downward forces and horizontal forces and movements about horizontal axes.

When dealing with slow shutter speeds, a solid tripod is a must-have tool for eliminating camera shake and capturing sharp photographs. 
Gitzo Traveler vs Systematic

When to Use a Tripod
It is important to know when you need to use a tripod. Shooting hand-held is effortless compared to setting up a tripod and mounting the camera on it, which is why many of us (myself included), prefer shooting hand-held when possible. 
Although most modern cameras are capable of producing excellent results with very low noise levels at high ISOs and thus have certainly reduced the need to use tripods, tripods are still preferred in low-light situations, especially when one desires highest quality images with little or no noise on high-resolution cameras. 
Since there are so many variables involved, such as camera hand-holding technique, shutter speed, ISO performance, sensor size, focal length, image stabilization, lens sharpness and camera to subject distance, there is no magic formula for figuring out exactly when a tripod must be used.
There are some considerations though, so here is the list based on my personal experience:
  • Weight: if gear is very heavy, it is best to avoid hand-holding it, especially when photographing for extended periods of time. 
  • Photography Genres: Landscape, Macro, Architecture and some other photography genres might require tripod use for precision, framing and consistency, even if light conditions are good. 
  • Hand-Holding Technique, Reciprocal Rule and Image Stabilization: knowing how to properly hand-hold your camera is important, but if shutter speed is too low, you might still be introducing camera shake. 
  • ISO Performance and Acceptable Level of Noise: some of the modern full-frame cameras are capable of producing superb images at high ISOs without introducing too much noise, losing lots of dynamic range and colors. However, there is always a fine line between what the camera can do and what your preference is in terms of what you consider acceptable. 
  • Print / Output Size: how large you are planning to print or display your images is also important. If you need amazing pixel-level quality for those large billboard-size prints or ultra high-resolution monitors, you might need to shoot at low ISO levels, which result in slower shutter speeds. 
  • Focal Length and Subject Distance: the longer the lens, the faster your shutter speed will need to be to yield sharp images when shooting hand-held. Subject distance is also important – if the subject is far away and represents a small part of your frame, poor sharpness will be much more obvious.
  • Camera and Lens Resolution: The more resolution your camera has, the more demanding it will be on your lenses and your hand-holding technique, so keep this in mind.

Using Tripod
After your tripod and camera are fully set up, it is time to employ additional techniques to avoid camera shake:
  • Camera Strap: Camera straps are convenient to have on your camera, but once mounted on a tripod, can cause camera shake in windy situations.
  • Shoot at Base ISO and Turn Off Auto ISO: Most cameras have the least amount of noise and the highest dynamic range at their base ISO (usually between ISO 64 and 200), so use the lowest native setting. Make sure to turn off Auto ISO.
  • Use Cable Release: Squeezing the shutter release with your fingers will surely cause camera shake, so it is a good idea to use a remote / cable release.
  • Self Timer: Adding a two+ second delay with self-timer is usually a good idea, especially if you do not have a remote / cable release.
  • Mirror Up: If you have a DSLR, its mirror causes a lot of vibration when it moves up before each exposure. Using Mirror Up will raise the mirror first, then you can wait a little before taking the shot. Mirror Up requires a remote / cable release.
  • Exposure Delay: If your camera has exposure delay feature and you do not have a remote / cable release, exposure delay mode can help effectively eliminate camera shake. With exposure delay, the camera mirror will go up, then the camera will wait for a specified time before taking a picture. 
  • Electronic Front Curtain Shutter: A number of new DSLRs (like Nikon D810) and mirrorless cameras have the Electronic Front Curtain Shutter feature. With this feature turned on, the camera will not operate its shutter mechanism at the beginning of the exposure, which can completely eliminate any kind of camera shake. 
  • Turn Off Image Stabilization: Unless your lens has a specific image stabilization mode to be used on tripods, you should always keep it turned off. 

Composing Landscapes


If you are looking to take your landscape photography to new levels, check out these ten composition tips for composing amazing landscape images…

  1. The Right Light

    Landscape by Frank Schmidt
    photo by Frank Schmidt
    Excellent lighting is a little-known secret behind some of the most amazing landscape photos today. The right lighting can do wonders for your landscape photography, and many professional photographers hint at the importance of lighting in their compositions.
    The dramatic light after a storm or the soft, beautiful glow during Golden Hour can make all the difference, and often is what separates a lackluster photograph from a truly outstanding image.
    Equally important to finding the right lighting is learning to work with available light. Paying attention to the direction, and quality of light can help you to learn which settings to use, which angles to photograph at, and which tools you need in order to cast your compositions in a better light. The right lighting can make all the difference. Try it, and see the difference in your landscapes.
  2. Create Balance

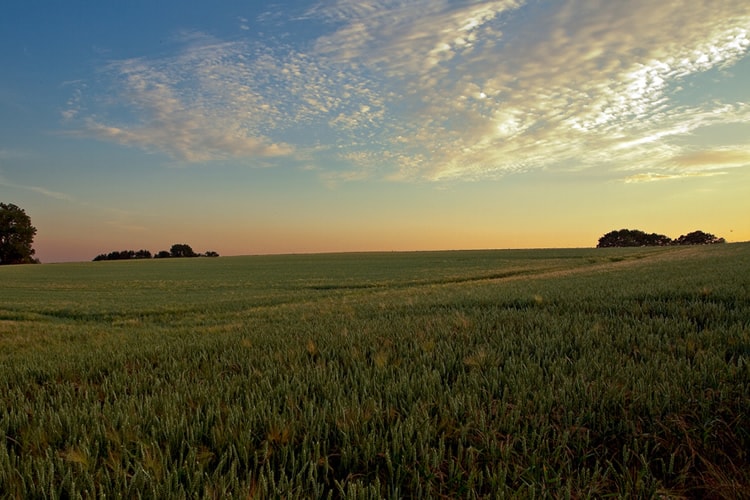
    Landscape by Stig Nygaard
    photo by Stig Nygaard
    The importance of a well-balanced composition is an often-overlooked, but important part of a good composition. All of the elements in a composition should work together to create an image that is visually balanced. Balance your compositions by making sure one side of the image doesn’t contain overpowering elements that cause the side of the photo to be “too heavy.
    As with anything, there are exceptions to his rule. Sometimes breaking the balance for the sake of creating visual interest or tension is a good thing.
  3. Consider the Rule of Thirds

    National Park Service, Alaska Region
    photo by National Park Service, Alaska Region
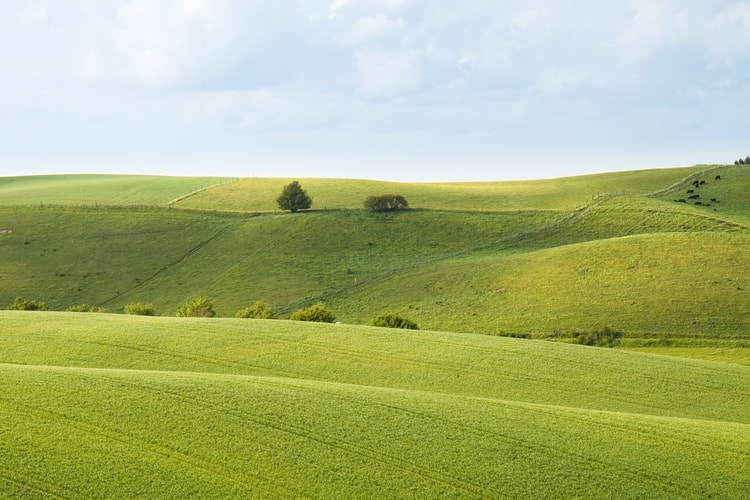
    Following on from balance; keeping the rule of thirds in mind can help to create visually balanced landscape compositions. The rule of thirds is a well-known compositional technique that says to place your main focal point off to the side of an image, rather than dead center. This often results in natural looking, and well-balanced photos.
    While the rule of thirds is a good starting point, sometimes this rule should be broken. Often, compositions will call for the focal point to be in the center, or even slightly off center – the key is a visually balanced composition.
  4. Create Visual Interest

    Landscape by Richard Walker
    photo by Richard Walker
    Look for ways to create visually interesting compositions. The best images grab your attention, and draw you into the image.
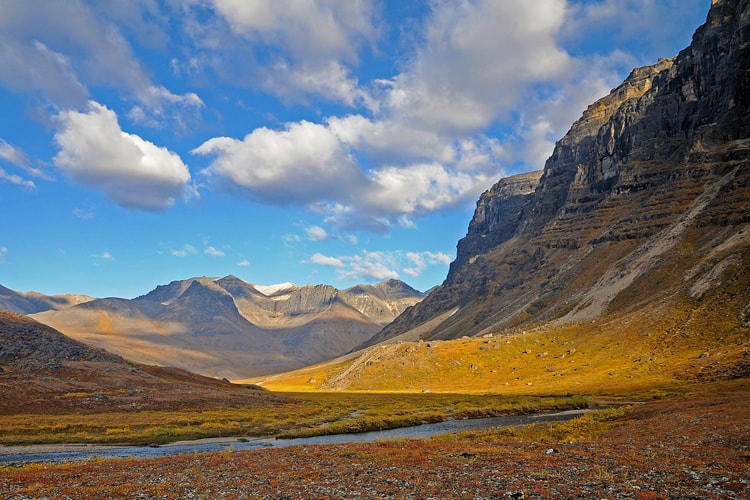
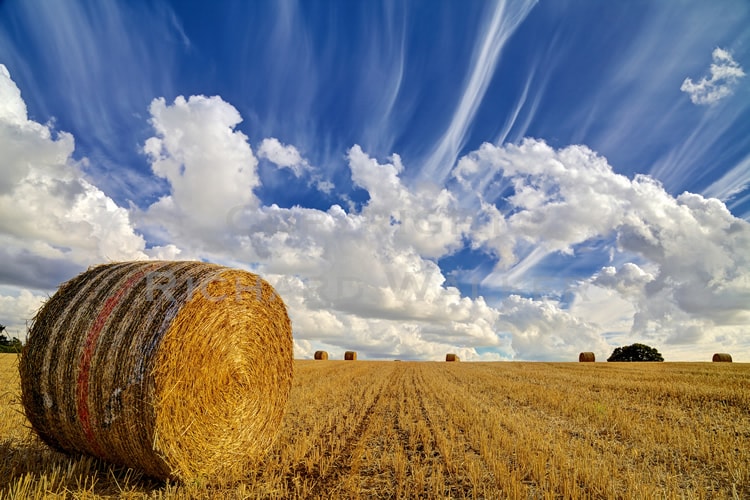
    With landscape photography, there are many different ways that you can create interest. One of the best ways is to find a strong subject matter such as a boat, the setting sun, a tree, or a mountain; and then look for supporting elements that draw the focus onto the subject. Or look for contrasting details; jagged rocks and tidal pools in the foreground that contrast with the foamy ocean in the background; or delicate blades of grass that contest with an imposing mountain. Contrast is a great way to create visual tension.
  5. Take Advantage of Negative Space

    Landscape by M@rio72
    photo by M@rio72
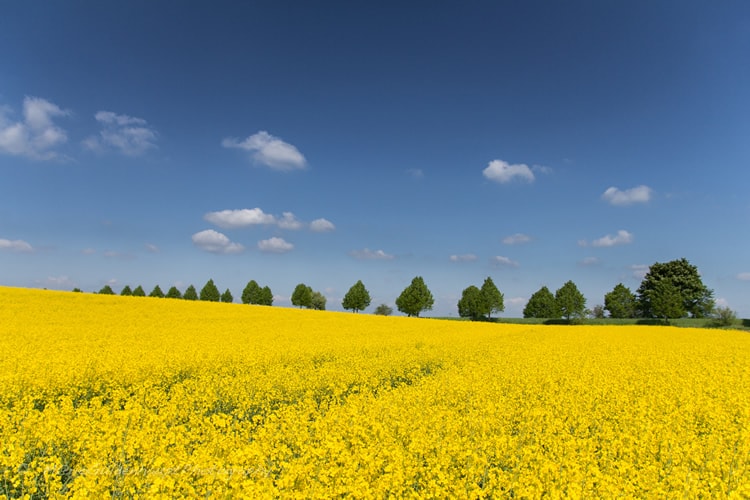
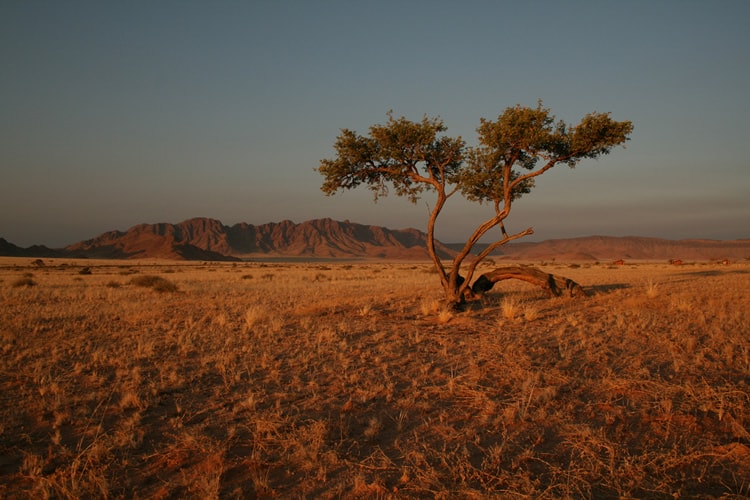
    You don’t have to fill the entire frame with detail; oftentimes images with negative spaces are more dramatic. A lonely lighthouse against a pale, foggy background or a lone tree against a cloudless blue sky are both examples of the effective use of negative space in landscape imagery.
    While it’s different from the norm, negative space can be used to create visually striking landscape photographs.
  6. Look for Leading Lines

    Landscape by Dan Eckert
    photo by Dan Eckert
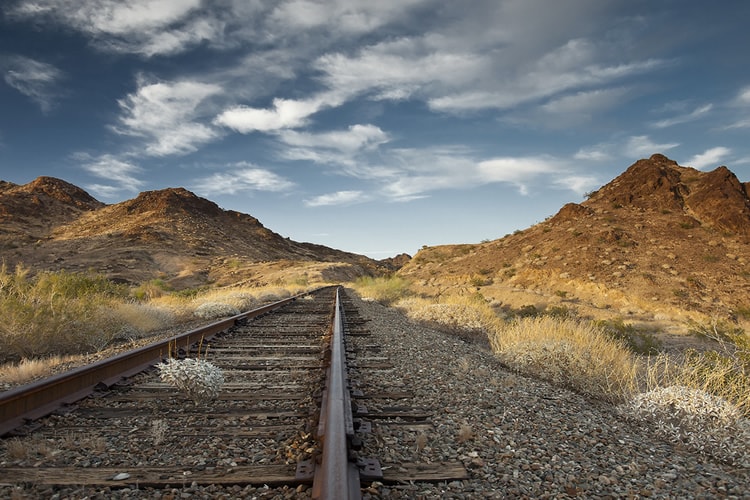
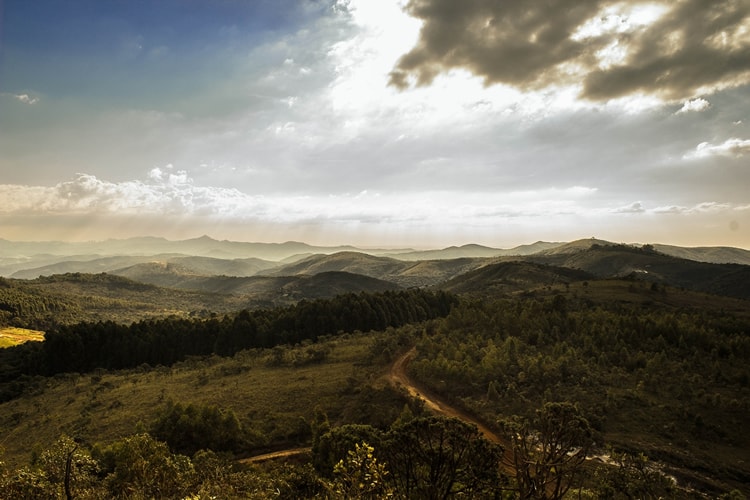
    Look for opportunities to incorporate leading lines in your landscape images. Lines can be an effective way to help lead your viewers’ eyes through the image, and can help to draw attention to the focal point. Examples of leading lines include roads, trails, or rivers, or waves breaking onto the shoreline.
    Look for opportunities to include lines that will naturally draw your eye through the composition.
  7. Include Foreground Interest

    Landscape by Daniel Zedda
    photo by Daniel Zedda
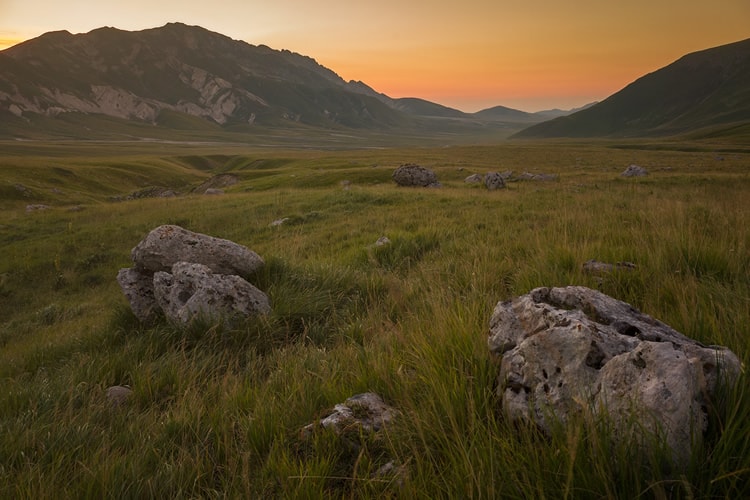
    It’s been said that “A landscape is not a landscape without an introduction.” Including part of the foreground in your landscape compositions is a great way to set the context and introduce your viewers to the scene.
    Including foreground can help to grab the viewer’s attention, and draw them into the image, creating a sense of perspective and interest. Including foreground elements that help to set the stage can result in engaging and captivating photos.
  8. Frame Your Image

    Landscape by Till Westermayer
    photo by Till Westermayer
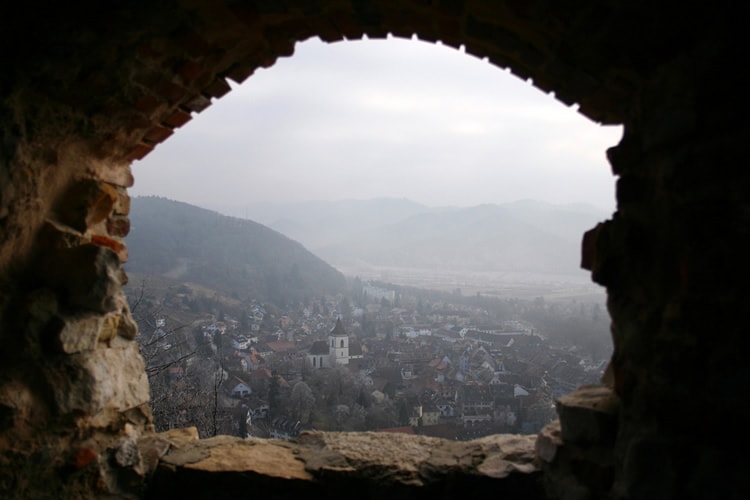
    While including points of interest in the foreground is one way to frame your images, keep on the lookout for other ways to frame your images in. A classic example of this is including overhanging tree branches along the edge of the image, or using opportunities to use the ‘frame within the frame’ technique that involves looking through a doorway, or an arch to create a frame within the composition itself.
  9. Simplify

    Landscape by Vernon Swanepoel
    photo by Vernon Swanepoel
    While many landscapes involve extensive detail, simplifying your landscape compositions can lead to powerful and striking compositions. Simplifying your landscapes involves cutting out everything that isn’t absolutely necessary for the composition; ensuring that the foreground details are relevant, and making sure the focal point is framed properly.
    Simplifying doesn’t mean creating boring and bland compositions, it does mean leaving out distracting details, and working to ensure the focus is on the main focal point.
  10. Don’t Stress Perfection

    Landscape by Tiago Gerken
    photo by Tiago Gerken
    Instead of focusing on creating ‘technically perfect’ compositions, focus on creating images that are visually moving, and use compositional techniques to help you achieve that goal.The best images are not the ones that are just technically good, but rather, the ones that are striking, interesting, and visually exciting! Using the principles of good composition, and working towards creating powerful and distinctive images will result in stronger compositions that are powerful, meaningful, and engaging.